Setting up the mix February 11, 2008
Posted by ConnorSmith in : Mixing, Project Studio , trackbackNow, there are many many different techniques people like to employ when working a mix in their DAW of choice. I am going to show you my favorite. This method routes all of your audio to a bus, which then gets processing via an aux track, and then is directed to an audio track for printing. This is a great way of mixing in a DAW because of two main things:
1) You can apply effects to the “master bus”, and then actually see the resulting waveform
2) You can compare mixes/progress from day to day with a click of a button (as well as keep track of vocal up/down or other alternate mixes with ease) So, here’s what you do.
First group your tracks however you wish, and setup any summing busses that you like. In plain English, that means to send all your drums to bus1-2, bass to 3-4, vocals 5-6… or whatever numbers you choose. Then create an Aux track for each group with those inputs. So assuming you sent all your drums to bus 1-2 and setup an aux track (like in the picture below), you have now summed your drums. NOTE: if you are in Logic, when you choose to send/output to a bus, it will automatically create an aux track for you with the input of that bus.
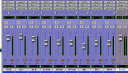
Also, for anyone who needs to know how to make the sigma/sum symbol, its option-W on a mac. Not sure on the PC… sorry
Once you have everything that you would like summed to aux tracks, find EVERY track that is outputting to your “main outs” (this is usually labeled as output 1-2, or analog 1-2, or mainout 1-2…). Change all those tracks to output to your second last stereo bus. So, if you have 32 busses, choose to output to 29-30. If you have 64 busses, choose 61-62. NOTE: Its obviously not necessary to choose these exact numbers, but this will really help with organization. Now make a new Aux track and make its input the bus you chose. Make its OUTPUT your final stereo bus (31-32, 63-64 etc.).
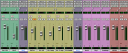
Finally, create a stereo audio track and name it whatever your song/project name is. Make that track’s input your last bus, and its output to Main Out 1-2 (or Output 1-2, analog 1-2… you get it). If your DAW has input monitoring (aka not pro tools…), click that for this audio track. If you are using Pro Tools, please check out the video in this article for a quick work-around. Phew! Now all of your audio is being summed to a bus, passing through an aux track where you will insert your master effects and processing, and finally traveling to an audio track, where you can print the file.
Now lets look at the edit window. Record-enable the final audio track and record your song all the way through (this will also give you a chance to hear how your final mix sounds all the way through). Now you can rename the file whatever you want (so you can easily find it in the audio folder on your drive).
If you want to do a new mix, or create a vocal up/down mix, that is simple too. Go back into the mixer and adjust the levels to your fancy (Usually vocal up/down is +1.5 dB). Now back in the mix window, create a new playlist (or “take” in other DAWs) on the final audio track. Label it appropriately (My song Mix1 Vox Up). Now record the song through again, listening to make sure it sounds how you want. Now, with this setup, you can easily compare your mixes by switching back and forth between the playlists. This is not only good for vox up/down, its also good for mixes on different days. At the end of a mix day, print your mix. Then the next day, work on a new playlist. At the end of day 2, record that mix in, and now you can compare yesterday’s and today’s mixes with a click of a button. Cool huh?
As always, email me here with questions. Videos are coming soon for these last few blogs, so stay tuned!
C
The Studio Files
Comments»
There will be a video of this posted within a day or so, so stay tuned.