Battling a Large Body of Water: Part 2 August 12, 2008
Posted by ConnorSmith in : Acoustics, Microphone Techniques, Studio Setup , trackbackSetting up mics on a drum kit in a converted basement is a bit of a nightmare (with of course the end result being that we want it to sound like we didn’t record it in a basement). Unfortunately, its a nightmare than many of us will go through at least once (if not many times) in our lifetime.
You’ll notice in these pictures I have made some pink diffusers for the ceiling. If you really want to know how to make them, I will share them in another article, but I will warn you: they take like 6 hours a piece to make, they are super annoying, and your hands will hurt very badly when you are done… That being said, they work extremely well and cost about 14$ a piece (for materials). Post in the comments here if you want a full article on them.
First the pictures, then let’s talk technique.
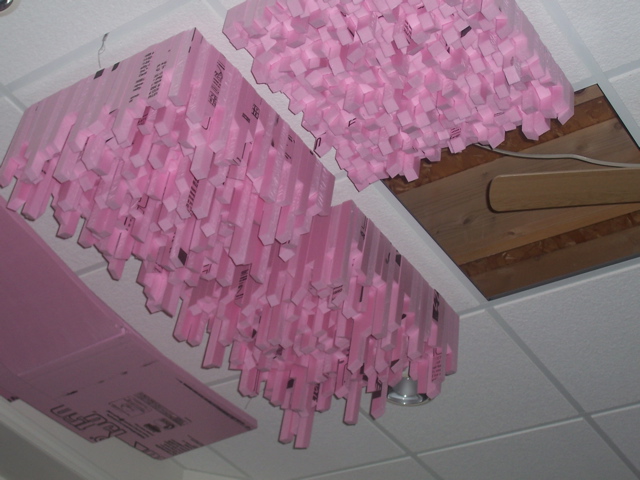
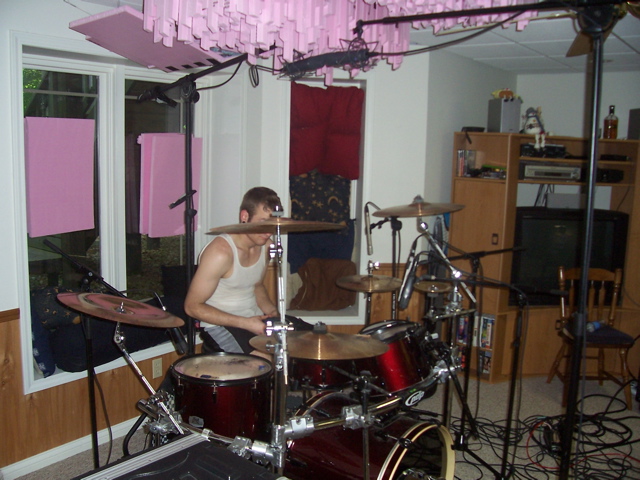
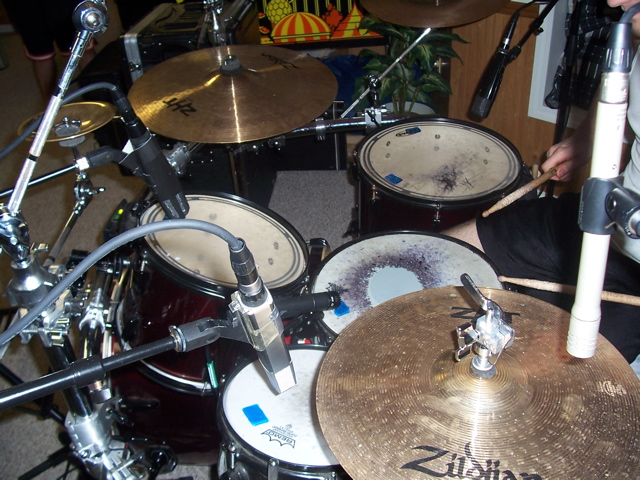
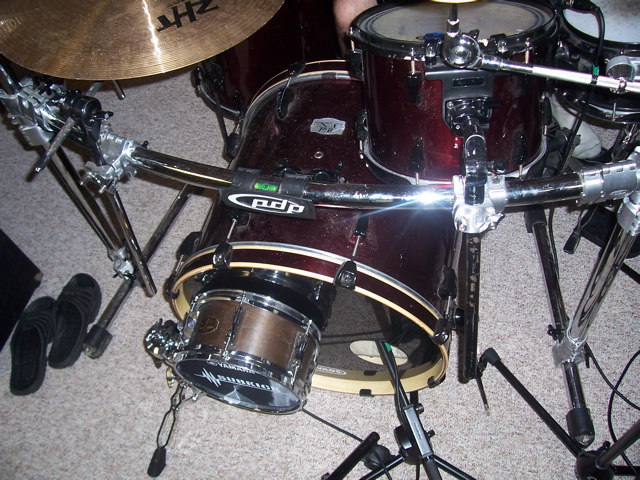
Matt (the drummer) had a 3 tom setup with a fair amount of cymbals. His drums sounded OK, but we spent about an hour tuning them, adding moon gel to the toms/snare, tuning the kick, adding more padding, etc… As far as “acoustic treatment” for the room (and I use that term with caution…), I started with the ceiling diffusers, then added some pillows to the bay windows. Across from the drum set (not pictured) about 14 feet back is a big, flat wall. This was going to be a huge “slap” problem, so I took a big mattress and propped it on top of a couch (long ways), and it effectively blocked the whole wall with padding (worked great!!). The big pink things on the windows are just extra foam I had leftover from the diffusers. My hope was that by hanging them at opposing angles, they would help the slap off of the windows. I think they helped.
My first concern was getting a good overhead position. I was a little reluctant to do a spaced pair for two reasons: the diffusers stuck down too far (plus the low ceilings) and with the close walls, there’s a bigger chance for nasty reflections. I ended up sticking the two large diaphragm condensers in between the sets of diffusers and angling against each other about 105-110 degrees. (Picture 2) The room mics were a spaced pair of omni’s about 10 feet back as well as the stereo ribbon from Sontronics (which we ended up using in place of the omni’s).
The rest of the mics were fairly self-explanatory: MD421′s and the like on the toms (few inches off the head, usually angling somewhat towards the center of the drum), an SM57 on the snare top, and an SM81 on the bottom (also an 81 on the hat). Kick drum was taken care of with a Yamaha Sub Kick outside and a Beta 52 inside, pointed at the beater.
As you will see in the “drum mixing” article which will follow eventually, I embrace a lot of the inevitable bleed. I rarely use gates. Given the circumstances (of recording in a basement), I found it better to go into the project knowing that I am going to be dealing with bleeding. To me, with too many gates running, it sounds “fake”. Bleed is inevitable, let it happen. (That being said… a snare mic with more cymbal than snare is obviously less than desirable).
I am not on the computer with the audio files… I will try to get some examples of the drums up here tomorrow.
More to Come
C
The Studio Files
Questions/Comments? Post in the comments here or email me.
Comments»
just a note on the pink diffusers..
why would u bother ur self and spend so much time on it.. simply i used to work in my room before i got hired in a studio. n man have you ever watch Hustle & Flow?? this might sound stupid… but neways i used to have sound absorption problem when i record voices & live instruments.. but i did like hustle n flow got a couple of those cup holders from mcdonalds but not for the whole room n plus i added a couple of sponges wrapped em up wit some pillow material, paste em on the wall… n i tell u man i didnt have that problem where sound bounces from wall to wall.. plus my walls werent parallel… so that was an advantage as well…
jus a suggestion to drop …
Well, with vocals and some live instruments, you can sometimes get away with a little more as far as bad room acoustics go ::disclaimer – obviously room acoustics for ALL sources are important::. However, in my experience with live drums, the room is very very very important.
Not having parallel walls will help a lot (unfortunately, I had a few to deal with), but even without parallel walls, proper treatment is a good idea. The diffusers took awhile to make, but once they get cleaned up and get some paint/covering of some sort on them, they will look pretty cool (so I could feel comfortable with them in a project studio). The unfortunate part was that they took a lot longer to make than I thought they would. The first one was exciting to make, so I decided to keep going…
We did do some before and after tests, and the diffusers helped the drum sound tremendously(!).
What’s “Hustle and Flow”? I’ve never seen it.